

Metadata harvesting
The metadata harvesting is the process of gathering metadata from a data source that exists in your system and is supported by TDV, in order to store it in the Metadata assets.
The harvesting can be run for data sources that are already configured in the TDV or for the new ones that are defined in the Metadata.
If you start the ‘Harvesting’ service from an asset or a selection of assets, please, make sure that all assets were previously harvested by the Metadata agent.
If you start the ‘Harvesting’ service from an instance or a selection of instances, it will be possible to create a data source in TDV for those of them for which it does not exist yet. See paragraph create data source from instance.
The ‘Harvesting’ service cannot be run on disabled assets or instances.
Start harvesting service
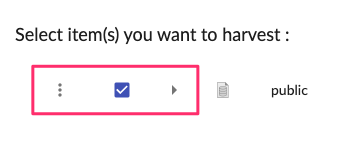
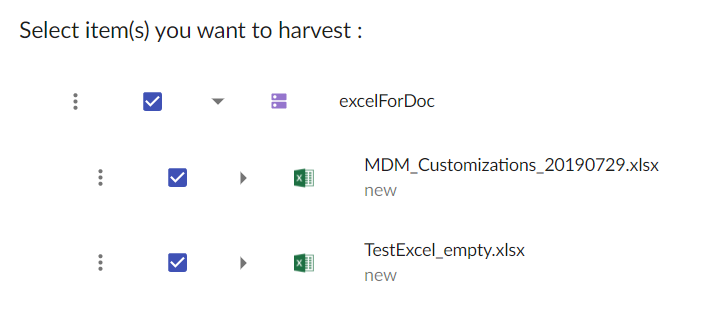
On the asset hierarchical view/instance view, select one or multiple asset(s)/instance(s) for which you want to harvest metadata.

Click on the top button to start the harvesting.
The harvesting main view will be displayed.
Harvesting main view
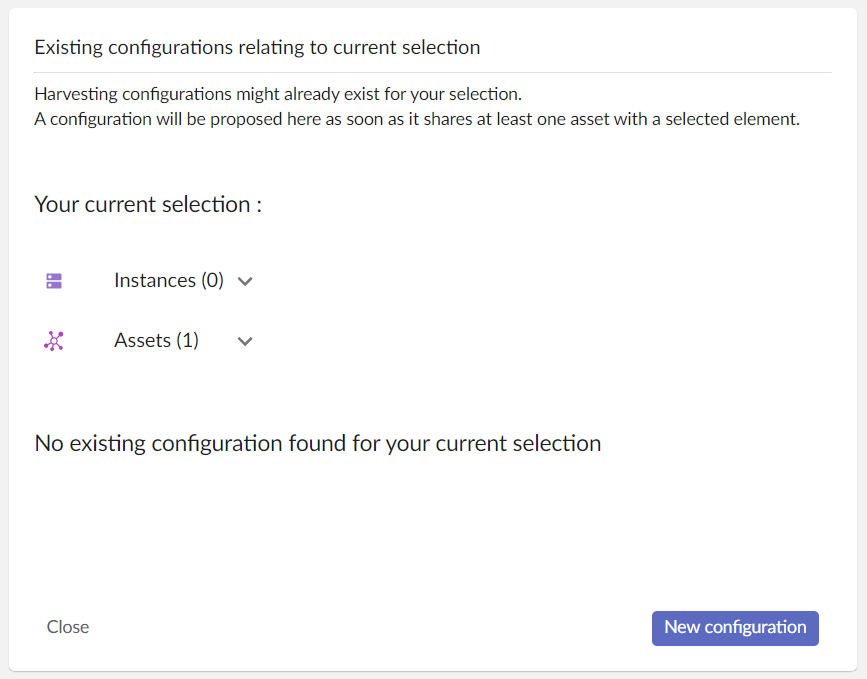
The harvesting main view displays your current selection and existing configurations.
An existing configuration is a harvesting that was already executed for one or several elements related to your current selection. If no existing configuration is available you will see a main view similar to the one in the screenshot below :
If you have an existing configuration, you will see something like the screenshot below :
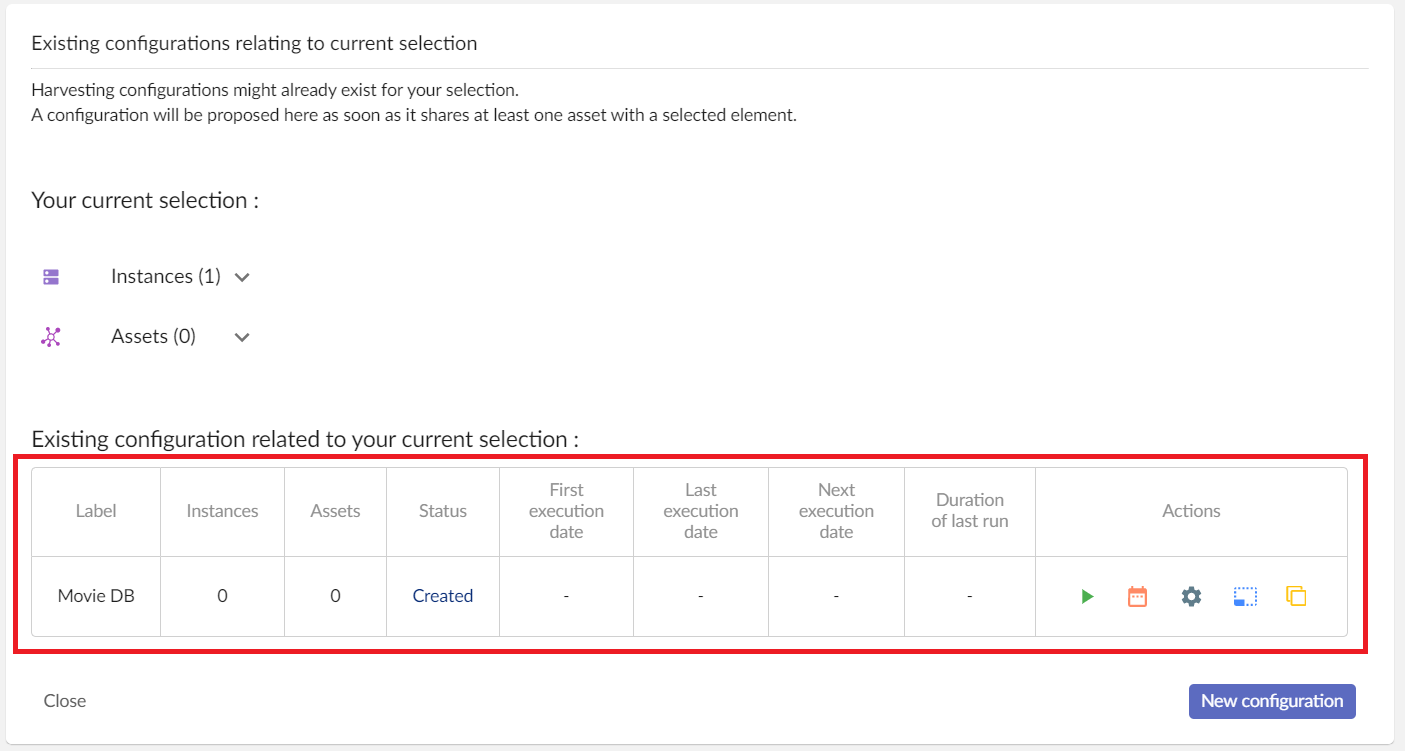
From an existing configuration, you can do multiple actions :
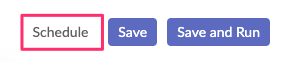
- Run
- Schedule
- Configure
- Duplicate
- Extend with current selection
See paragraph use an existing configuration
Create a new configuration
From the main view, click on the bottom right button “New Configuration”.
The new configuration screen will be displayed.
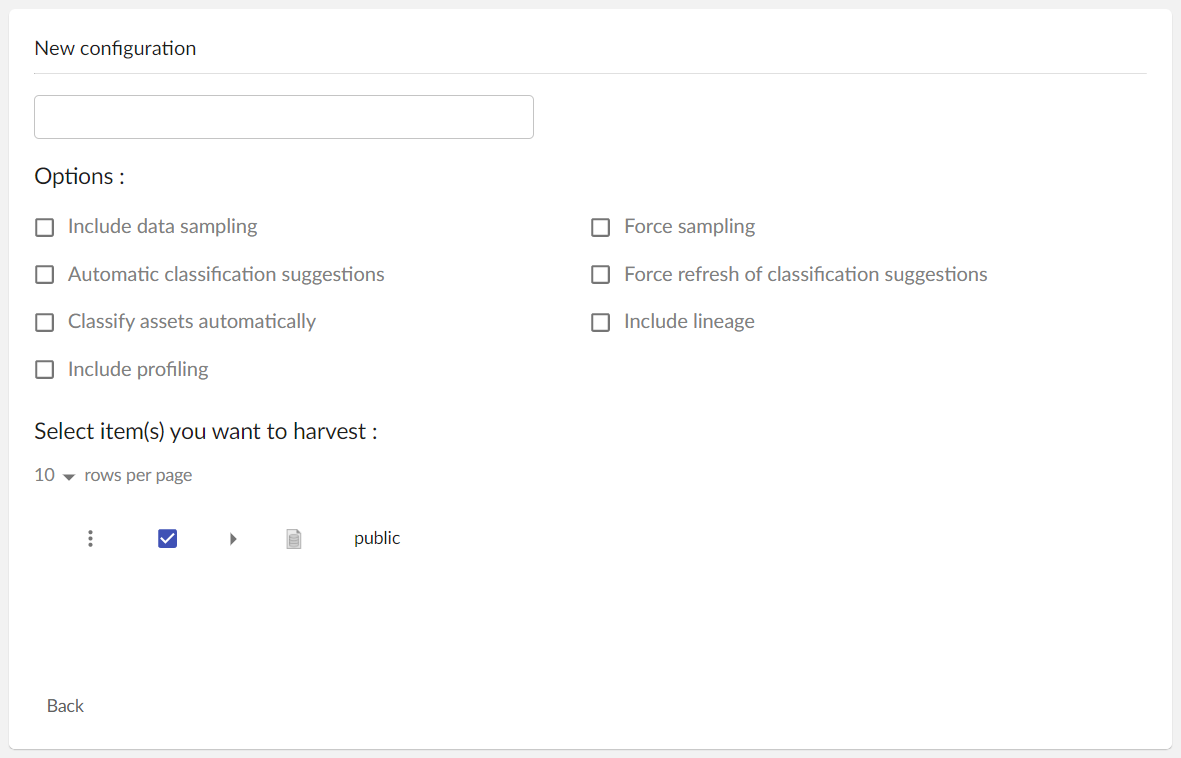
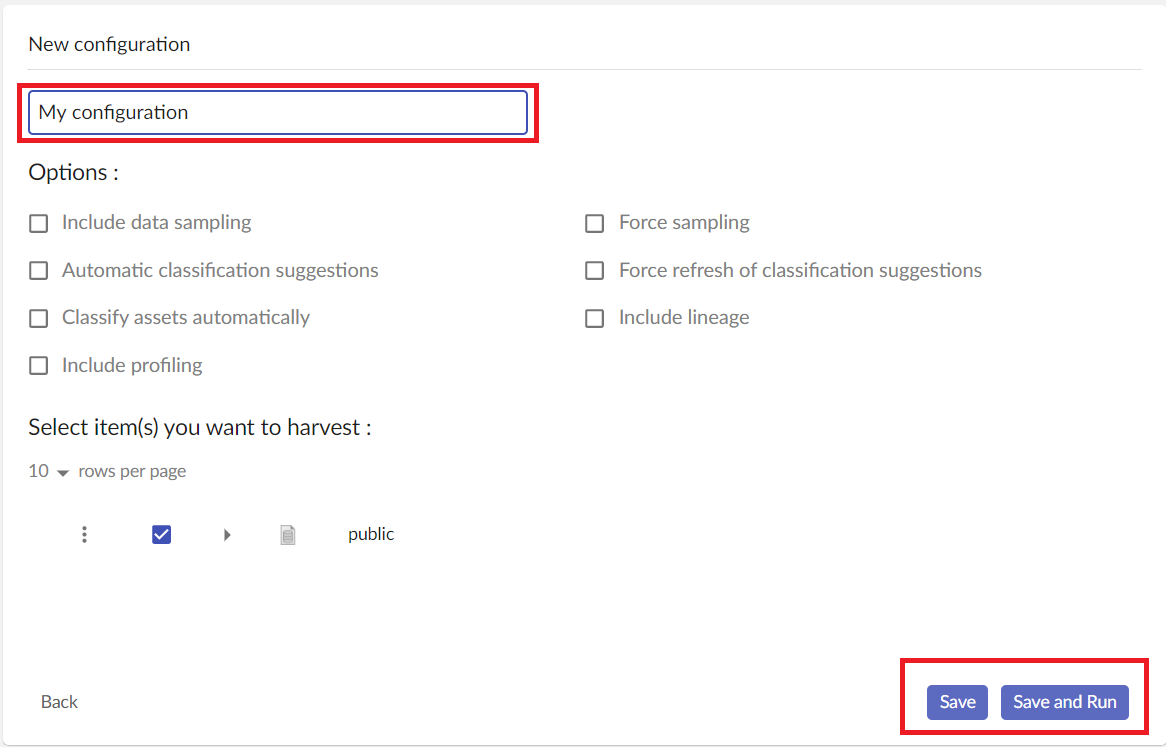
In this screen, start by adding a configuration name. This is necessary for displaying more actions.
On the top of this screen, you can see options :
- Include data sampling: for the assets eligible for sampling harvesting will retrieve data samples from the source system, if available. See [asset sampling] (./assetSampling.html) for more details regarding supported types.
- Force sampling (activates “Include data sampling” automatically): force data sampling on your assets (overwrite existing samples).
- Automatic classification suggestion: the harvesting will also start the classification of your assets.
- Force refresh of classification suggestion (activates “Automatic classification suggestion”): if your asset already have a classification suggestion, this option will force the harvesting to update it.
- Classify assets automatically (activate “Automatic classification suggestion”): Apply the classification suggestion to your asset instead of giving you a list of potential matches.
- Include lineage: if your harvesting contains assets of type TDV Published View, the lineage will be extracted and stored for them. As lineage can be quite complicated and concern a large number of resources, it is recommended to activate this option only for scheduled runs, not for the immediate harvesting executions.
- Include profiling: for eligible assets (DB table, CSV file, Excel worksheet) cardinality statistics and other profiling information will be included in the harvesting results. As queries for statistics can be time consuming on large data sources, it is recommended to activate this option only for scheduled runs, not for the immediate harvesting executions.
In the hierarchical view, you can have multiple actions :

|
This action allows you to unselect all children and keep the parent node selected. Only available if the node has children. |

|
Select or unselect the node for the harvesting. If the node has children, this action will also select/unselect all children. |

|
Expand more or expand fewer children. Clicking on this icon will display children if they exist, if not you will see "No data" message. If you have connection issues with TDV, you may see an error here. |

|
This is not an action but the name of the instance/asset with the logo.
In the subtitle, you have the storage information: - New : this is a new instance/asset - Stored : instance/asset is already in TIBCO Cloud™ Metadata |
Once you give your configuration a name and if at least one element is seleted for harvesting, you will see “Save” and “Save and Run” buttons on the bottom:
- Save: Only saves your configuration. After saving it, you can schedule it if needed (see schedule configuration)
- Save and Run: Save your configuration and run the harvesting. This action will display the ‘Run’ screen of the harvesting
Data profiling
Data profiling option is available for following asset types:
- DB table and its columns
- CSV file and its columns
- Excel Worksheet and its columns
If one of such assets is present in the scope of your harvesting (as a root asset or as a descendant), you can activate data profiling for it.
Please, note that data profiling can take time to be gathered from the physical data source, so we recommend to only activate this option for scheduled configurations and do not use it with direct running.
Following information can be retrieved from the data source:
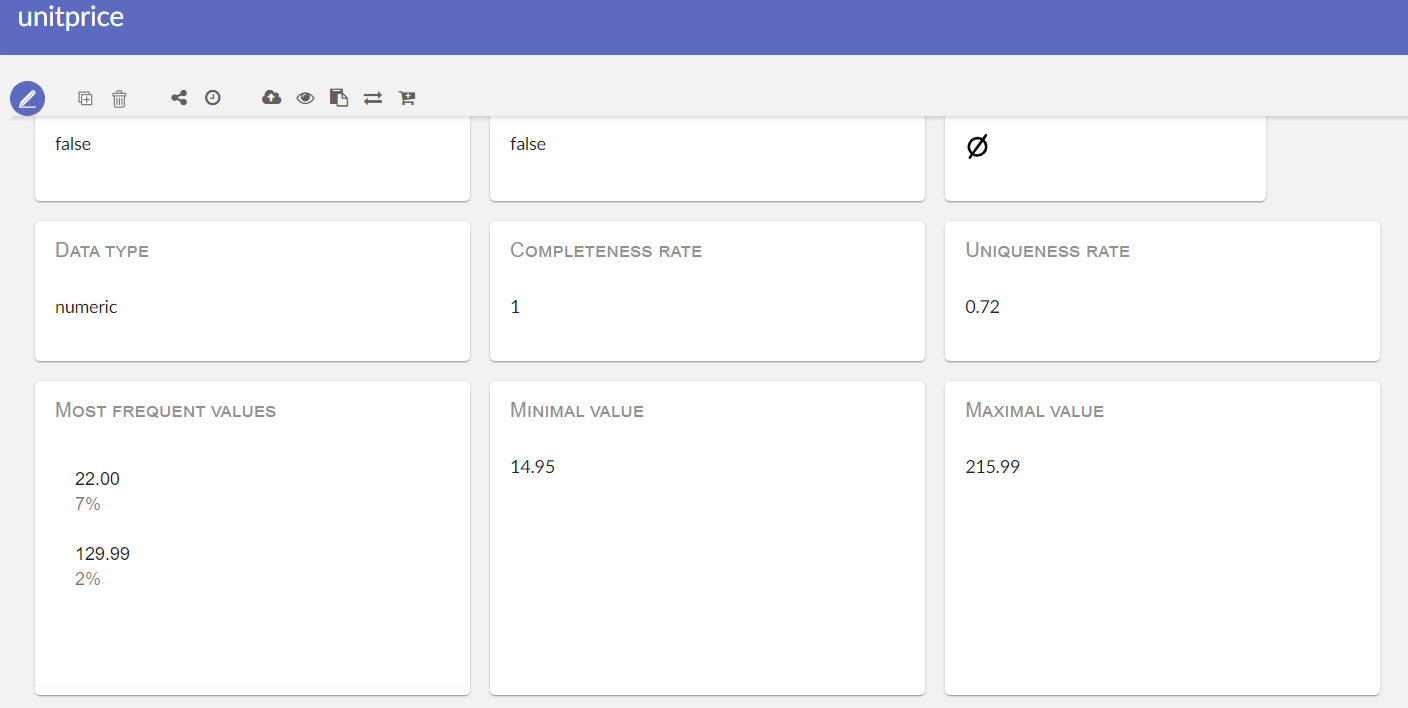
- Completeness rate: shows the part of non-null values in total values.
- Uniqueness rate: shows the part of unique values in total values.
- Most frequent values: lists top 5 values that are most common in this column.
- Minimal value: shows the minimum value in this column.
- Maximal value: shows the maximum value in this column.
Run configuration
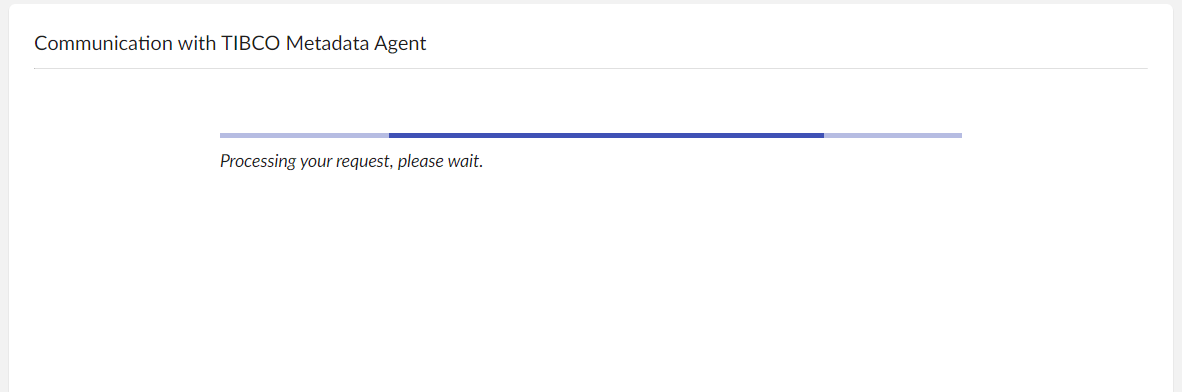
If you click on ‘Save and Run’ button from the configuration view you will start the harvesting. First the application needs to communicate with TDV, that’s why you will see the progress view.
After that, the progress table will be displayed.
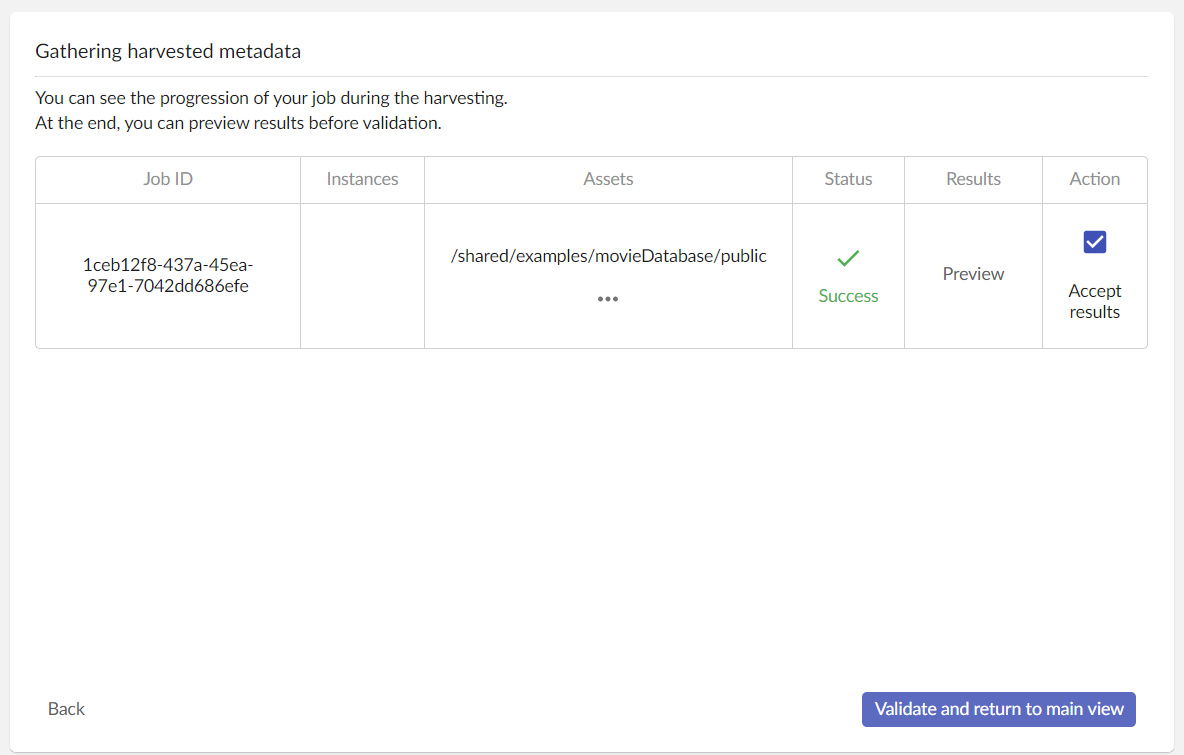
This table is auto-updated to display the status of the harvesting. You have multiple available actions :
- In the “Instances” or “Assets” column, you can click on “…” button to display the full list of instances/assets. This will be displayed as a pop-up. Click outside the popup to close it.
- In the “Results” column, once the status is “Success”, you can click on the “Preview” button to display harvesting results. If the status is “Failed” or “In progress”, this button is not available.
- If results are correct for you, you can check the “Accept results” checkbox to approve them. This checkbox is checked by default.
- Click on “Validate and return to main view” button to :
- Accepts results and add them in the asset table if “Accept results” is checked. You will be redirect to the main view.
- Reject results if “Accept results” is not checked. You will be redirected to the main view.
- Click on the “Back” button to go back to the main view. From the main view, you will be able to return to this progress view if your harvesting is not validate yet.
Once you validate results, you will see on the main view that your configuration status is updated.

Use an existing configuration
From the main harvesting view, if you have existing configurations, the following actions are available:

|
Run the configuration. You will see the progress view, then the progress table. |

|
Schedule the configuration. |

|
Configure the current configuration. You will see the configuration screen. |

|
Extend the configuration with current selection. Configuration screen will appear and the harvesting scope will be merged with your current selection. |

|
Duplicate the current configuration. A copy of this configuration will appear on the configurations list. |

|
See the progress table view. This option is only available if the configuration status is "Pending for approval". |
By clicking on the “Configure” button, you will see the configuration screen. This screen is similar to the one evoked in the create a new configuration section but the instance/asset hierarchy, configuration name, configuration options will be pre-filled. You will be able to change them and save it.
Schedule a harvesting
You can schedule one or several executions of an existing harvesting configuration. There are two ways to do so :
- From the configuration view, after saving the configuration, by clicking on the “Schedule” button on the bottom
- From the main view by clicking on the “Calendar” button
Clicking on the button will display a dialog box where you can configure the scheduling.
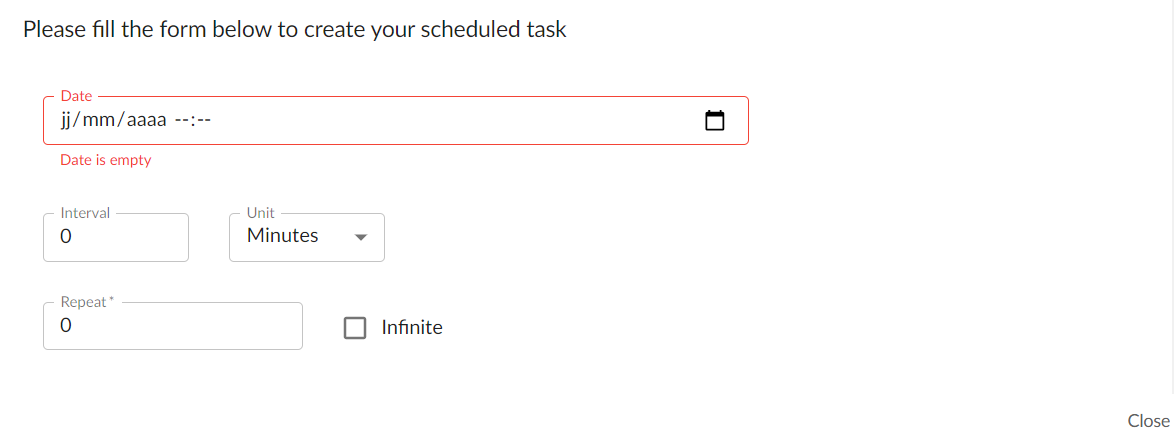
To save the scheduling you have to insert the date.
| Date |
This field is mandatory Insert the date and time here. You can use the arrow on the right to display the calendar. |
| Interval | Interval between multiple scheduling if repeat is set. |
| Unit | Unit of the interval. By default, it is in minutes but you can change it to hours or days. |
| Repeat | Number of repeats for the scheduling. To repeat this harvesting to infinite, check the 'Infinite' checkbox. |
Example: You want to schedule the harvesting every month. The date is 01/01/current year, interval 28 days and repeat is 12.
If you want to Cancel harvesting, you have to be sure that the configuration is already scheduled. You can see it from the main view, the configuration will have the status “Scheduled” and next execution date.

By clicking on the “Calendar” button near the configuration, the schedule dialog box will display a “Remove schedule” button. Click on it to cancel scheduling.

Create data source from instance
If you wish to harvest metadata for a data source that is not yet configured in TDV, you can configure it directly from TIBCO Cloud Metadata.
Prerequisites
To do so, first you need to check that all necessary information is provided in the instance’s attributes and that the instance type is supported for creation by TIBCO Cloud Metadata.
Currently, TIBCO Cloud Metadata allows creation of:
- relational data sources;
- file-based data sources, such as Excel, XML, WSDL or CSV;
- SOAP data sources;
- REST data sources (for these data sources, manual creation of the operations is required in TDV after creating the data source).
Complete list of supported adapters is available in the Administration - Datasource Types table with attribute ‘Creatable?’ = ‘Yes’.
An instance that you want to use to create a data source in TDV must provide necessary properties to connect to the physical data source from TDV. Below is the list of mandatory attributes depending on the type of the data source.
| Property | Description | Required for type |
|---|---|---|
| Name | Name of the instance is mandatory. The data source in TDV will be created with the same name. |
All |
| URL | Connection URL for database or path to the file/folder on the server for file-based sources. Expected format for different data source types is as follows:
|
All |
| Datasource type (TIBCO® Metadata Agent) | Data source type to communicate to TDV:
|
All |
| Host | Server host for database |
Relational database |
| Port | Server port for database |
Relational database |
| Database name | Database name. |
Relational database |
| User | User that has rights to connect to the database |
Relational database, SOAP, REST |
| Password | Password to use to connect to the database |
Relational database, SOAP, REST |
Create and harvest
Start creation of the new harvesting configuration for your instance as described in ‘Create a new configuration’ section.
Click to expand children of the instance. A ‘Create datasource’ button will appear.
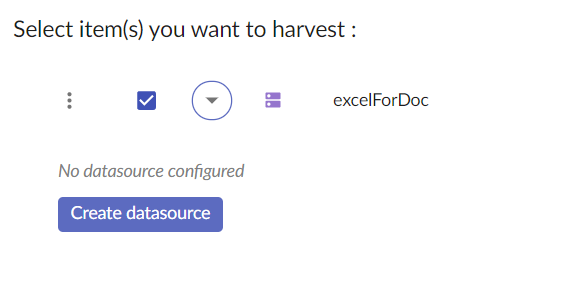
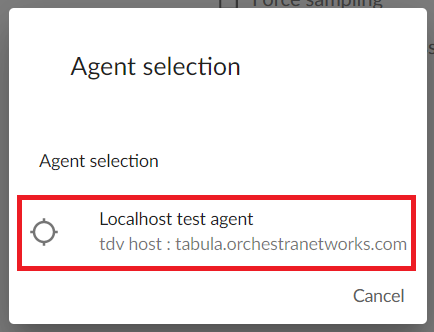
Click on it to show the list of available Metadata Agents. Click on the agent that you wish to use for data source creation to launch the process.
Wait for the process to complete. In case the creation was successful you will see a message ‘Done’ in green. Finalize the process by clicking on ‘Finish’.
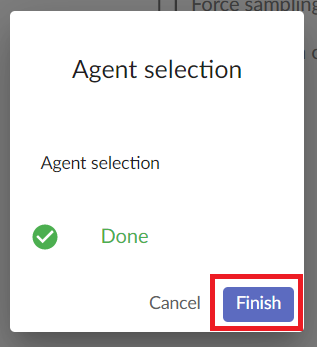
This should reload the harvesting screen and allow you to see the direct children of the instance.
You can now continue with harvesting configuration as described in previous sections.
Specific Cases
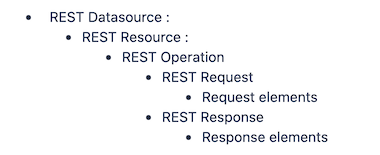
Harvesting REST Resources
Since version 2.0, TIBCO Cloud Metadata supports harvesting of REST resources documented manually in TDV. This comes with a specific behavior due to the way resources are documented in TDV. Indeed, TIBCO Cloud Metadata represents REST resources according to the RESTful architecture which is not the case in TDV.
Here is the way REST Resources are displayed :
Harvesting configurations on Assets under “Operation” in the hierarchy are not possible since these resources are created by the agent and do not exist in TDV.
During the configuration of a harvesting from a REST Datasource, you will see all the operations registered in TDV, but no REST Resource asset as they are created by TIBCO Cloud Metadata.