

Asset classification
TIBCO Cloud™ Metadata allows you to match Asset and Data Element. It’s the main feature that explains how a business object is linked to a technical one.
It’s possible to define this link on your own but it could take time on many assets. That’s why TIBCO Cloud™ Metadata has a classification feature that helps you to find the match between an asset (technical) and a data element (business).
Manual classification
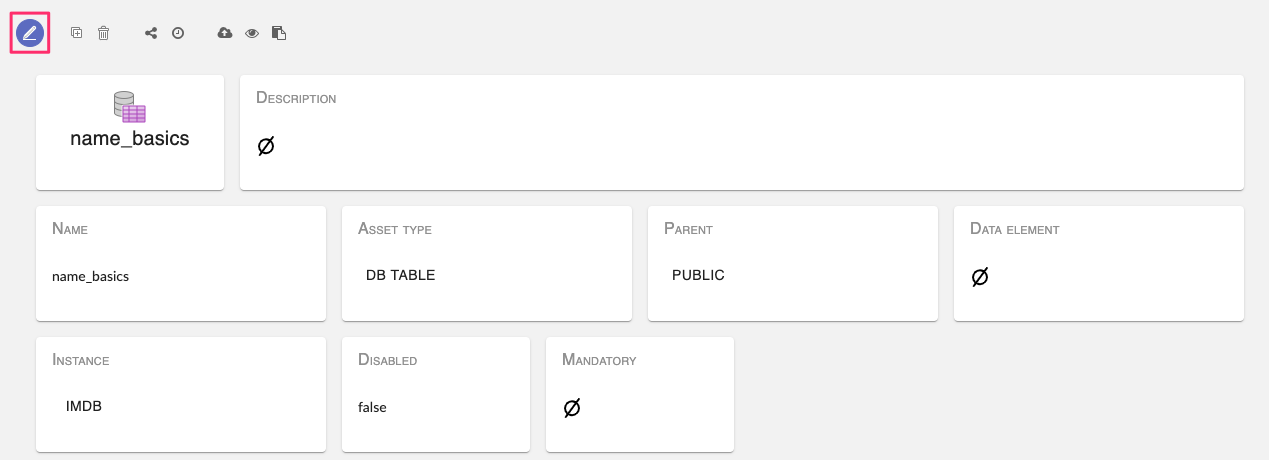
On the asset view, click on the edit button on the top left corner.
Then select the data element in data element list.
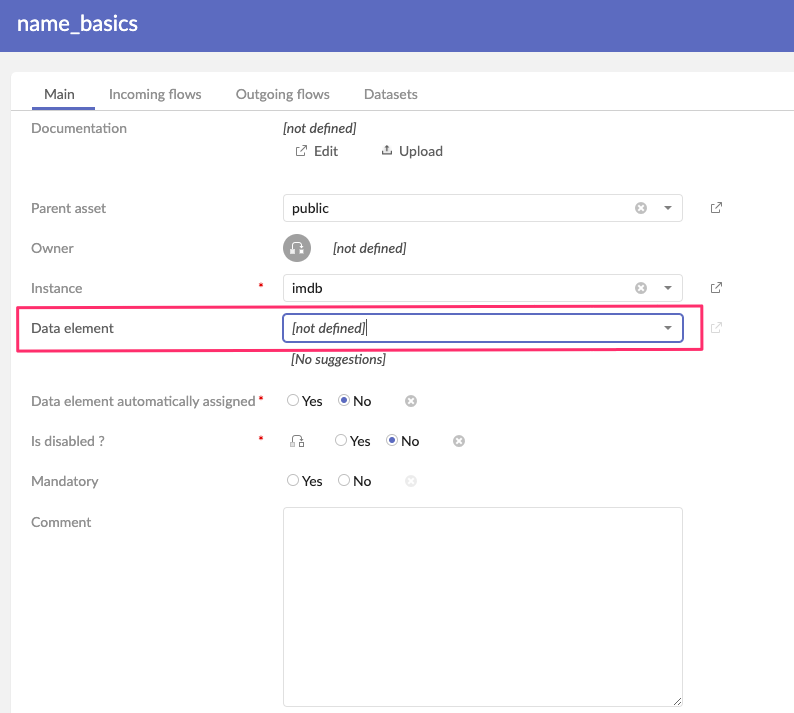
You can search by writing the data element. Do not forget to save your update.
Using classification console
Instead of searching and selecting the data element by yourself, you can use the “Classification Console” to give you some suggestions on the right data element to link to the current asset.
This option is using a predefined algorithm and needs data (see request sample) to get more efficiency.
-
From the hierarchical view, select one or multiple asset(s) you want to classify then click on the “classify” button on the top

-
From a single asset view, click on the “classify” button on the top

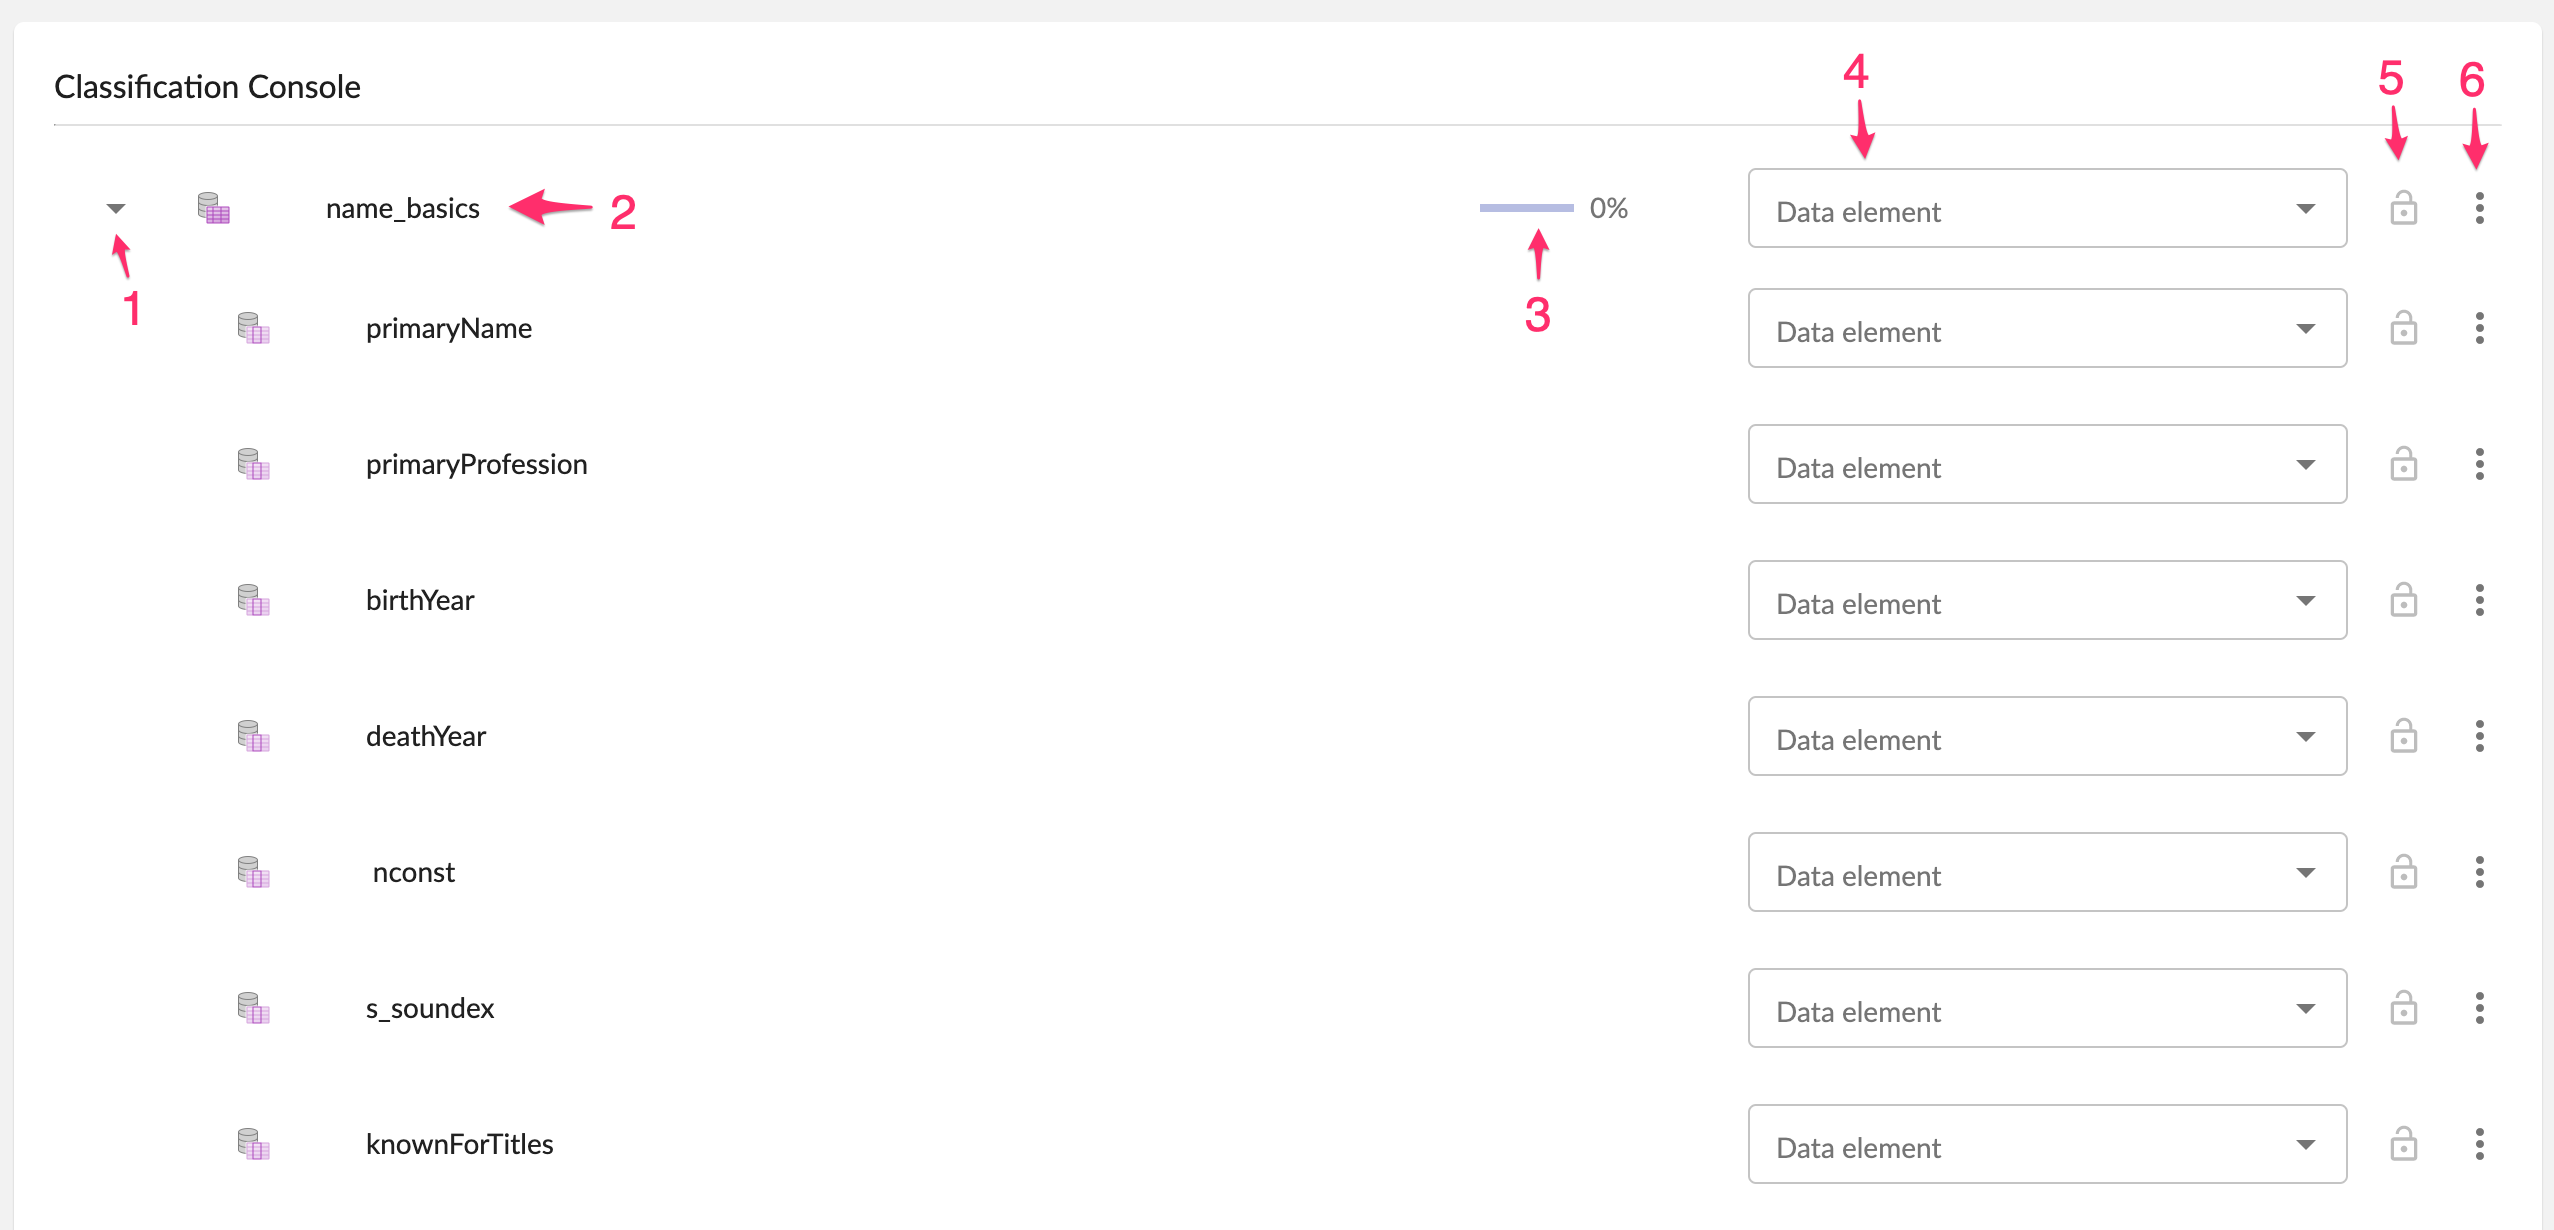
A new screen is displayed showing the current selected asset and its children if exist.

On this screen you can :
- Expand or collapse the hierarchy (only available for asset with children)
- Click on the asset name to see details
- See asset classification ratio (if asset and its children are classified)
- Search and select the data element to link with the asset
- Lock or unlock the data element for automatic classification
- Access extra option like running automatic classification
On the bottom bar you can :
- Save current modification
- Save and close classification console
- Revert current modification
- Close classification console (which will display a confirmation pop-up if you have current unsaved modifications)

Search and select a data Element
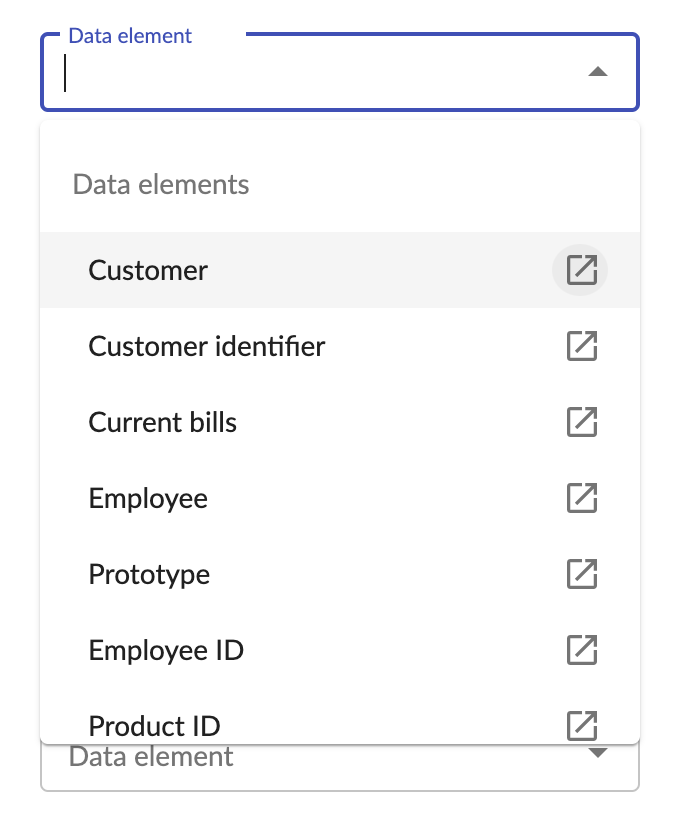
In the data element box, you can click on it and you will see :
- Data element suggestion list if exists
- Data element list
You can search a data element by writing text. You can see data element details by clicking on the “preview” button.
If a data element select box contains suggestions you will see a notification near it. By clicking on the box, you will see the suggestions and below all data element.
 A suggestion displays the matched result in percentage and information about the classification configuration used.
If you have done modifications, you will see a blue exclamation point on the left side of the data element select box.
By hovering it, you can see current modifications details (data element change, asset locked or unlocked)
Run automatic classification
To access extra options, click on the “vertical menu” button on the right side of lock option. Select “Run classification”. A pop-up will show up on which you can :
- Select the classification configuration
- Force refresh of classification suggestions
- Classify assets automatically (this will select the best matching data element for you. If you have unsaved changes, a warning message will inform you that you may lose modifications if you don’t save them before processing)
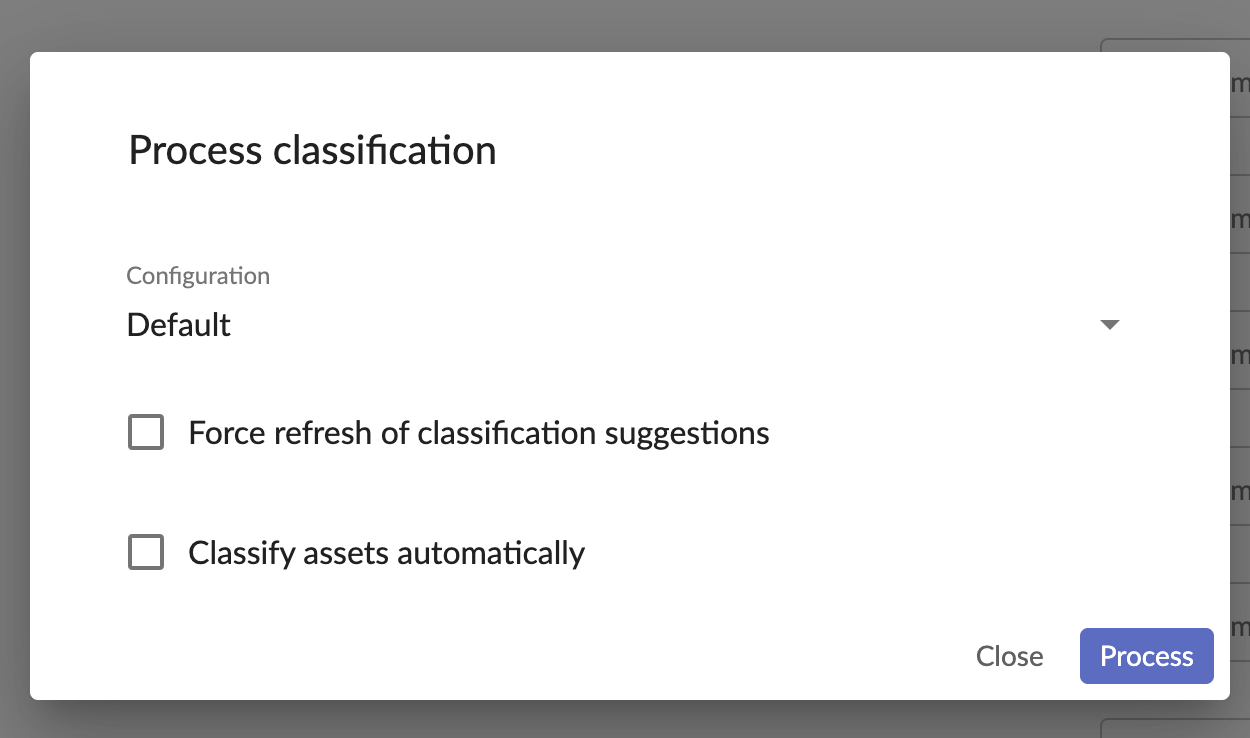
Click on “process” button to start classification. While the classification is running, you cannot run a new one on the current asset and its children.
Do not forget to save modifications after leaving the classification console.
Lock an asset
If there is an existing data element linked to an asset, you can lock it by clicking on the “lock button” on the right side of the data element select box. A locked asset is ignored if you run the classification process with “Classify assets automatically” option. An unlocked asset without data element can’t be locked.